Archive for the ‘Windows Azure’ Category

Like in the last year Portugal had made part of this event. Is really inspiring when you work in this area to see so many off your pears to go to an event like this at a Saturday and the Liberty day at Portugal, basically a non working day.

Was a pleasure to be present, was a shame not to be able to assist all the event, but my 3 weeks daughter had need assistance at morning.

gab


The event had some very interesting talks about what’s coming next (ASP.NET v-NExt, the great support to open source technologies in Azure, and some talks about business), as in last year i had the opportunity to speak at this event.

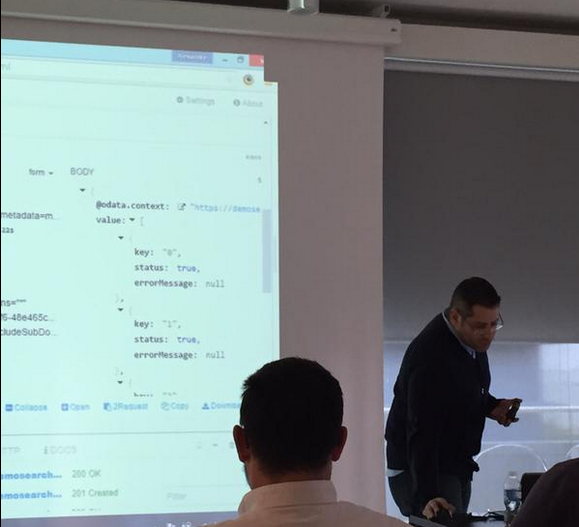
My talk was about Azure Search one azure service that i had been studying since the launch and that i always had desired since the launch of the Microsoft PAAS platform.

speaking at gab2015


I don’t know how many of you guys had pass the challenge of implementing or thinking about Search in the context of your Website, Portal or App, but this topic can have a big complexity. And i think along the year’s Search had not the value he deserves.

Azure Search really allow you to use Search as a Service hosted on the cloud. This is one more off that kind of services Azure have that i think is excellent to grant the backend part of our web or app development.

The most fantastic thing about Search is that this service is agnostic to the client technology and even allows a full control and interation using a REST API.

I will keep developing and diving into this topic and I hope soon I have a deep dive to share with all our developer’s, for know i let you with my slide deck and the suggestion to stay tuned with this service and start to playing around with this service.

You can download our full version off the slidedeck from Gab2015 azure search as a service 

Windows Azure Platform diagram

Posted: February 20, 2015 in Architecture, Windows Azure
Tags:

Today i had recieved this fantastic poster, I think taking a look in this is a excelent way to have a high level vision of what’s avaiable for us on the platform.

azureinfographi


You can download also this poster directly from Microsoft at: http://azure.microsoft.com/en-us/documentation/infographics/azure/


Azure free ebook

Posted: February 17, 2015 in Books, Windows Azure
Tags:

Today ia was reading some chapters of a new microsoft book about Windows Azure. This book is a good fundamentals book for the ones who know already Windows Azure and need to know a litle more about other features of Azure that we don t use everyday,


Microsoft Azure Essentials: Fundamentals of Azure

I would also recommend this book for beginers ( IT professionals and developer’s) . I will really sugest for everyone that use Azure and need to take alook at some fundamentals to take a look before looking for a different book. You can get him from http://aka.ms/697225pdf.

My congrats to Michael S. Collier (https://michaelcollier.wordpress.com/) and E. Shahan both MVP’s for the excelent book and in the name of the developmnt community a big thnaks for the KB pass.

Michael S. Collier and Robin E. Shahan 


Nowadays when we go to a client or a fellow developing Sharepoint and we talk about Microsoft Sharepoint on the cloud a doubt always arise “are we talking about a Virtual machine on the cloud or Office 365? “.

azurevsoffice3654sp013

In the past 3 years had been almost a war to justified to clients the options, especially with the push Microsoft had been making around Office 365. Today i’ had read a post from Chris McNulty that really summarizes what i had been writing saying and teaching about the theme (you can find the original post here http://www.cmswire.com/cms/information-management/sharepoint-in-the-clouds-choosing-between-office-365-or-azure-027187.php).

We hope that this can help you to take the right decision and have a clear idea about the differences. All the credits off this post go to CMSWire and Chris McNulty.

SharePoint in the Clouds: Choosing Between Office 365 or Azure
There are dozens of cloud hosting options for SharePoint, beyond Office 365. Amazon, Rackspace and Fpweb offer compelling alternatives to Microsoft’s public cloud for SharePoint online with a mix of capabilities.

These capabilities fall on the spectrum between two options:

  1. IaaS (Infrastructure as a service) — cloud hosted VMs on which YOU install Windows, SQL, SharePoint. For better or worse, you have complete control over administration and customization.
  2. SaaS (Software as a service) — fully managed solution delivering SharePoint services with full subscribed provider managed availability, backup, performance, installation, etc. For better or worse, you have limited control of administration and customization.

Now, it’s debatable that Office 365 itself is a pure SaaS solution — you carry a lot of responsibility for managing your own security and content. Let’s suppose that Azure hosted virtual machines represent IaaS and Office 365 represents SaaS.

Decisions, Decisions

How best to decide? Try the following survey. Give yourself points for each answer, and use the key at the end to see how your situation compares:

2014-14-Nov-McNulty-Image1.png

Answer Key

<40

You are comparatively free of the history and capabilities of many on-premises environments. As a result, you’re a strong candidate for Office 365. You will get immediate benefits from the platform services without needing to disrupt existing content patterns or internal processes.

41-80

You have the classic posture of an on-premises environment. If you are trying to gain some of the advantages of the cloud, an IaaS solution like Azure VMs may be a stronger fit for your organization. Based on your use cases, a hybrid between O365 and Azure may also introduce some of the service simplicity of Office 365 with the complete admin control from Azure.

>80

On premises forever! You can work on other projects for the year while your needs progress and the solutions improve.

Obviously, your use cases may vary significantly form those mentioned here. This is intended to help you access your success criteria relative to the business cases and economics. Best of luck with your cloud(s) evolution.

Last Saturday Windows Azure had a WorldWide BootCamp, a nice opportunity to know more about Azure and ti participate in a crowd research project (know more at http://global.windowsazurebootcamp.com/)

dwab

Portugal was no exception and @ Microsoft Portugal people had explore the for what the what and the how to use Windows Azure, in a event with some interesting Technical Talks and also some Technicall experiments and coaching (know more at https://gwab-lisboa.eventday.com/).


I Had the pleasure to speak at this event about Mobile Services is the third time i make a conference speaking about the theme and showing how easy and usefull this service can be in cutting edge development. You can find my slides at http://www.slideshare.net/amarreiros/gwab-mobile-services.

Was a great pleasure to be with some of my old partners and colleagues, sharing the stage with some of the more fantastic speakers of our market and some of the greatest specialist of Azure in Portugal.

Thank you for the opportunity to show once again how to make our work easy and show what’s behind the courtains of a so interesting technology. And for my readers a uestion Are you already using Mobile Services?

I had been doing some experiences of Sharepoint 2013 in the Windows Azure Platform. At this time i am finishing a full powershell script to help to automate this process.

Untitled

But for the experience of build from scratch a Sharepoint 2013 Farm you have around the web a lot of material. Not all references drive you to a well succeeded installation, so i decided to share with you an excellent Technet blog post that in a few steps can lead you to a succeeded installation if you are needing to build a simple farm like  lab or staging environment.

Let’s Get Started!

In this step-by-step guide, you will learn how to:

  • Register a DNS Server in Windows Azure
  • Define a Virtual Network in Windows Azure
  • Configure Windows Server Active Directory in a Windows Azure VM
  • Configure SQL Server 2012 in a Windows Azure VM
  • Configure SharePoint Server 2013 in a Windows Azure VM

Exercise 1: Register a DNS Server in Windows Azure

Register the internal IP address that our domain controller VM will be using for Active Directory-integrated Dynamic DNS services by performing the following steps:

  1. Sign in at the Windows Azure Management Portal with the logon credentials used when you signed up for your Free Windows Azure Trial.
  2. Select Networks located on the side navigation panel on the Windows Azure Management Portal page.
  3. Click the +NEW button located on the bottom navigation bar and select Networks | Virtual Network | Register DNS Server.
  4. Complete the DNS Server fields as follows:- NAME: XXXlabdns01
    – DNS Server IP Address: 10.0.0.4
  5. Click the REGISTER DNS SERVER button.

Exercise 2: Define a Virtual Network in Windows Azure

Define a common virtual network in Windows Azure for running Active Directory, Database and SharePoint virtual machines by performing the following steps:

  1. Sign in at the Windows Azure Management Portal with the logon credentials used when you signed up for your Free Windows Azure Trial.
  2. Select Networks located on the side navigation panel on the Windows Azure Management Portal page.
  3. Click the +NEW button located on the bottom navigation bar and select Networks | Virtual Network | Quick Create.
  4. Complete the Virtual Network fields as follows:- NAME: XXXlabnet01
    – Address Space: 10.—.—.—
    – Maximum VM Count: 4096 [CIDR: /20]
    – Affinity Group: Select the Affinity Group defined in the Getting Started steps from the Prerequisitessection above.
    – Connect to Existing DNS: Select XXXlabdns01 – the DNS Server registered in Exercise 1 above.
  5. Click the CREATE A VIRTUAL NETWORK button.

Exercise 3: Configure Windows Server Active Directory in a Windows Azure VM

Provision a new Windows Azure VM to run a Windows Server Active Directory domain controller in a new Active Directory forest by performing the following steps:

  1. Sign in at the Windows Azure Management Portal with the logon credentials used when you signed up for your Free Windows Azure Trial.
  2. Select Virtual Machines located on the side navigation panel on the Windows Azure Management Portal page.
  3. Click the +NEW button located on the bottom navigation bar and select Compute | Virtual Machines | From Gallery.
  4. In the Virtual Machine Operating System Selection list, select Windows Server 2012 Datacenter and click the Next button.
  5. On the Virtual Machine Configuration page, complete the fields as follows:- Version Release Date: Select the latest version release date to build a new VM with the latest OS updates applied.
    – Virtual Machine Name: XXXlabad01
    – New User Name: Choose a secure local Administrator user account to provision.
    – New Password and Confirm Password fields: Choose and confirm a new local Administrator password.
    – Size: Small (1 core, 1.75GB Memory)

    Click the Next button to continue.

    Note: It is suggested to use secure passwords for Administrator users and service accounts, as Windows Azure virtual machines could be accessible from the Internet knowing just their DNS.  You can also read this document on the Microsoft Security website that will help you select a secure password:http://www.microsoft.com/security/online-privacy/passwords-create.aspx.

  6. On the Virtual Machine Mode page, complete the fields as follows:- Standalone Virtual Machine: Selected
    – DNS Name: XXXlabad01.cloudapp.net
    – Storage Account: Select the Storage Account defined in the Getting Started steps from thePrerequisites section above.
    – Region/Affinity Group/Virtual Network: Select XXXlabnet01 – the Virtual Network defined inExercise 2 above.
    – Virtual Network Subnets: Select Subnet-1 (10.0.0.0/23)

    Click the Next button to continue.

  7. On the Virtual Machine Options page, click the Checkmark button to begin provisioning the new virtual machine.As the new virtual machine is being provisioned, you will see the Status column on the Virtual Machines page of the Windows Azure Management Portal cycle through several values includingStopped, Stopped (Provisioning), and Running (Provisioning).  When provisioning for this new Virtual Machine is completed, the Status column will display a value of Running and you may continue with the next step in this guide.
  8. After the new virtual machine has finished provisioning, click on the name ( XXXlabad01 ) of the new Virtual Machine displayed on the Virtual Machines page of the Windows Azure Management Portal.
  9. On the virtual machine Dashboard page for XXXlabad01, make note of the Internal IP Addressdisplayed on this page located on the right-side of the page.  This IP address should be listed as10.0.0.4.If a different internal IP address is displayed, the virtual network and/or virtual machine configuration was not completed correctly.  In this case, click the DELETE button located on the bottom toolbar of the virtual machine details page for XXXlabad01, and go back to Exercise 2 and Exercise 3 to confirm that all steps were completed correctly.
  10. On the virtual machine Dashboard page for XXXlabad01, click the Attach button located on the bottom navigation toolbar and select Attach Empty Disk.  Complete the following fields on the Attach an empty disk to the virtual machine form:- Name: XXXlabad01-data01
    – Size: 10 GB
    – Host Cache Preference: None

    Click the Checkmark button to create and attach the a new virtual hard disk to virtual machine XXXlabad01.

  11. On the virtual machine Dashboard page for XXXlabad01, click the Connect button located on the bottom navigation toolbar and click the Open button to launch a Remote Desktop Connection to the console of this virtual machine.  Logon at the console of your virtual machine with the local Administrator credentials defined in Step 5 above.
  12. From the Remote Desktop console of XXXlabad01, create a new partition on the additional data disk attached above in Step 10 and format this partition as a new F: NTFS volume.  This volume will be used for NTDS DIT database, log and SYSVOL folder locations.If you need additional guidance to complete this step, feel free to leverage the following study guide for assistance: Windows Server 2012 “Early Experts” Challenge – Configure Local Storage
  13. Using the Server Manager tool, install Active Directory Domain Services and promote this server to a domain controller in a new forest with the following parameters:- Active Directory Forest name: contoso.com
    – Volume Location for NTDS database, log and SYSVOL folders: F:

    If you need additional guidance to complete this step, feel free to leverage the following study guide for assistance: Windows Server 2012 “Early Experts” Challenge – Install and Administer Active Directory

  14. After Active Directory has been installed, create the following user accounts that will be used when installing and configuring SharePoint Server 2013 later in this step-by-step guide:- CONTOSO\sp_farm – SharePoint Farm Data Access Account
     CONTOSO\sp_serviceapps – SharePoint Farm Service Applications Account

    If you need additional guidance to complete this step, feel free to leverage the following study guide for assistance: Windows Server 2012 “Early Experts” Challenge – Install and Administer Active Directory

The configuration for this virtual machine is now complete, and you may continue with the next exercise in this step-by-step guide.

Exercise 4: Configure SQL Server 2012 in a Windows Azure VM

Provision a new Windows Azure VM to run SQL Server 2012 by performing the following steps:

  1. Sign in at the Windows Azure Management Portal with the logon credentials used when you signed up for your Free Windows Azure Trial.
  2. Select Virtual Machines located on the side navigation panel on the Windows Azure Management Portal page.
  3. Click the +NEW button located on the bottom navigation bar and select Compute | Virtual Machines | From Gallery.
  4. In the Virtual Machine Operating System Selection list, select SQL Server 2012 SP1 Enterprise and click the Next button.
  5. On the Virtual Machine Configuration page, complete the fields as follows:- Virtual Machine Name: XXXlabdb01
    – New User Name: Choose a secure local Administrator user account to provision.
    – New Password and Confirm Password fields: Choose and confirm a new local Administrator password.
    – Size: Medium (2 cores, 3.5GB Memory)

    Click the Next button to continue.

  6. On the Virtual Machine Mode page, complete the fields as follows:- Standalone Virtual Machine: Selected
    – DNS Name: XXXlabdb01.cloudapp.net
    – Storage Account: Select the Storage Account defined in the Getting Started steps from thePrerequisites section above.
    – Region/Affinity Group/Virtual Network: Select XXXlabnet01 – the Virtual Network defined inExercise 2 above.
    – Virtual Network Subnets: Select Subnet-1 (10.0.0.0/23)

    Click the Next button to continue.

  7. On the Virtual Machine Options page, click the Checkmark button to begin provisioning the new virtual machine.As the new virtual machine is being provisioned, you will see the Status column on the Virtual Machines page of the Windows Azure Management Portal cycle through several values includingStopped, Stopped (Provisioning), and Running (Provisioning).  When provisioning for this new Virtual Machine is completed, the Status column will display a value of Running and you may continue with the next step in this guide.
  8. After the new virtual machine has finished provisioning, click on the name ( XXXlabdb01 ) of the new Virtual Machine displayed on the Virtual Machines page of the Windows Azure Management Portal.
  9. On the virtual machine Dashboard page for XXXlabdb01, make note of the Internal IP Addressdisplayed on this page.  This IP address should be listed as 10.0.0.5.If a different internal IP address is displayed, the virtual network and/or virtual machine configuration was not completed correctly.  In this case, click the DELETE button located on the bottom toolbar of the virtual machine details page for XXXlabdb01, and go back to Exercise 2 and Exercise 3 to confirm that all steps were completed correctly.
  10. On the virtual machine Dashboard page for XXXlabdb01, click the Attach button located on the bottom navigation toolbar and select Attach Empty Disk.  Complete the following fields on the Attach an empty disk to the virtual machine form:- Name: XXXlabdb01-data01
    – Size: 50 GB
    – Host Cache Preference: None

    Click the Checkmark button to create and attach the a new virtual hard disk to virtual machine XXXlabdb01.

  11. On the virtual machine Dashboard page for XXXlabdb01, click the Connect button located on the bottom navigation toolbar and click the Open button to launch a Remote Desktop Connection to the console of this virtual machine.  Logon at the console of your virtual machine with the local Administrator credentials defined in Step 5 above.
  12. From the Remote Desktop console of XXXlabdb01, create a new partition on the additional data disk attached above in Step 10 and format this partition as a new F: NTFS volume. After formatting this new volume, create the following folders:
    1. Create F:\MSSQL folder
    2. Create F:\MSSQL\DATA folder
    3. Create F:\MSSQL\LOGS folder
    4. Create F:\MSSQL\BACKUP folder
  13. Open SQL Server Management Studio from Start | All Programs | Microsoft SQL Server 2012 | SQL Server Management Studio and update default folder locations to the F: volume.
    1. Connect to the SQL Server 2012 default instance using your Windows Account.
    2. Now, you will update the database’s default locations for DATA, LOGS and BACKUP folders. To do this, right click on your SQL Server instance and select Properties.
    3. Select Database Settings from the left side pane.
    4. Locate the Database default locations section and update the default values for each path to point to the new folder paths defined above in Step 12.
    5. Close SQL Server Management Studio.
  14. In order to allow SharePoint to connect to the SQL Server, you will need to add an Inbound Rule for the SQL Server requests in the Windows Firewall. To do this, open Windows Firewall with Advanced Security from Start | All Programs | Administrative Tools.
    1. Select Inbound Rules node, right-click it and select New Rule to open the New Inbound Rule Wizard.
    2. In the Rule Type page, select Port and click Next.
    3. In Protocols and Ports page, leave TCP selected, select Specific local ports, and set its value to1433. Click Next to continue.
    4. In the Action page, make sure that Allow the connection is selected and click Next.
    5. In the Profile page, leave the default values and click Next.
    6. In the Name page, set the Inbound Rule’s Name to SQLServerRule and click Finish
    7. Close Windows Firewall with Advanced Security window.
  15. Using the Server Manager tool, join this server to the contoso.com domain and restart the server to complete the domain join operation.
  16. After the server restarts, connect again via Remote Desktop to the server’s console and login with the local Administrator credentials defined above in Step 5.
  17. Open SQL Server Management Studio from Start | All Programs | Microsoft SQL Server 2012 | SQL Server Management Studio and add the CONTOSO\Administrator user to SQL Server with the Sysadmin server role selected.
    1. Expand Security folder within the SQL Server instance. Right-click Logins folder and select New Login.
    2. In the General section, set the Login name to CONTOSO\Administrator, and select theWindows Authentication option.
    3. Click Server Roles on the left pane.  Select the checkbox for the Sysadmin server role.
    4. Click the OK button and close SQL Server Management Studio.

The configuration for this virtual machine is now complete, and you may continue with the next exercise in this step-by-step guide.

Exercise 5: Configure SharePoint Server 2013 in a Windows Azure VM

Provision a new Windows Azure VM to run SharePoint Server 2013 by performing the following steps:

  1. Sign in at the Windows Azure Management Portal with the logon credentials used when you signed up for your Free Windows Azure Trial.
  2. Select Virtual Machines located on the side navigation panel on the Windows Azure Management Portal page.
  3. Click the +NEW button located on the bottom navigation bar and select Compute | Virtual Machines | From Gallery.
  4. In the Virtual Machine Operating System Selection list, select SharePoint Server 2013 Trial and click the Next button.
  5. On the Virtual Machine Configuration page, complete the fields as follows:- Virtual Machine Name: XXXlabapp01
    – New User Name: Choose a secure local Administrator user account to provision.
    – New Password and Confirm Password fields: Choose and confirm a new local Administrator password.
    – Size: Large (4 cores, 7GB Memory)

    Click the Next button to continue.

  6. On the Virtual Machine Mode page, complete the fields as follows:- Standalone Virtual Machine: Selected
    – DNS Name: XXXlabapp01.cloudapp.net
    – Storage Account: Select the Storage Account defined in the Getting Started steps from thePrerequisites section above.
    – Region/Affinity Group/Virtual Network: Select XXXlabnet01 – the Virtual Network defined inExercise 2 above.
    – Virtual Network Subnets: Select Subnet-1 (10.0.0.0/23)

    Click the Next button to continue.

  7. On the Virtual Machine Options page, click the Checkmark button to begin provisioning the new virtual machine.As the new virtual machine is being provisioned, you will see the Status column on the Virtual Machines page of the Windows Azure Management Portal cycle through several values includingStopped, Stopped (Provisioning), and Running (Provisioning).  When provisioning for this new Virtual Machine is completed, the Status column will display a value of Running and you may continue with the next step in this guide.
  8. After the new virtual machine has finished provisioning, click on the name ( XXXlabapp01 ) of the new Virtual Machine displayed on the Virtual Machines page of the Windows Azure Management Portal.
  9. On the virtual machine Dashboard page for XXXlabapp01, make note of the Internal IP Addressdisplayed on this page.  This IP address should be listed as 10.0.0.6.If a different internal IP address is displayed, the virtual network and/or virtual machine configuration was not completed correctly.  In this case, click the DELETE button located on the bottom toolbar of the virtual machine details page for XXXlabapp01, and go back to Exercise 2,  Exercise 3 and Exercise 4 to confirm that all steps were completed correctly.
  10. On the virtual machine Dashboard page for XXXlabapp01, click the Connect button located on the bottom navigation toolbar and click the Open button to launch a Remote Desktop Connection to the console of this virtual machine.  Logon at the console of your virtual machine with the local Administrator credentials defined in Step 5 above.
  11. In the Server Manager tool, click on Local Server in the left navigation pane and click on theWorkgroup option.  Join this server to the contoso.com domain and restart the server to complete the domain join operation.
  12. After the server restarts, re-establish a Remote Desktop connection to the server and logon with theCONTOSO\Administrator domain user credentials defined earlier in Exercise 3.
  13. In the Server Manager tool, click on Local Server in the left navigation pane and select IE Enhanced Security Configuration.  Turn off enhanced security for Administrators and click the OK button.Note: Modifying Internet Explorer Enhanced Security configurations is not good practice for production environments and is only for the purpose of this particular step-by-step lab guide.
  14. On the Desktop, double-click on the SharePoint 2013 Products Configuration Wizard shortcut to launch the configuration wizard.  Click the Next button to continue. If prompted to start or reset services, click the Yes button.
  15. In the SharePoint Products Configuration Wizard, when prompted on the Connect to server farm dialog, select the option to Create a new server farm.
  16. On the Specify Configuration Database Settings, specify the following values for each field:- Database Server: XXXlabdb01
    – Username: CONTOSO\sp_farm
    – Password: Type the password specified when the sp_farm domain user account was created earlier inExercise 3, Step 14.
  17. Click the Next > button and accept all other default values in the SharePoint Products Configuration Wizard.  Click the Finish button when prompted to complete the wizard.
  18. The SharePoint 2013 Central Administration web page should launch automatically.  When prompted, click the Start the Wizard button to begin the Initial Farm Configuration Wizard.
  19. When prompted for Service Account, type the CONTOSO\sp_serviceapps domain username and password specified when this account was created earlier in Exercise 3, Step 14.
  20. Accept all other default values and click the Next > button to continue.
  21. On the Create a Site Collection page, create a new top-level Intranet site collection using the following field values:- Title and Description: Enter your preferred Title and Description for the new site collection
    – URL: Select the root URL path – http://XXXlabapp01/
    – Select experience version: 
    2013
    – Select a template: Publishing | Publishing Portal

    Click the OK button to provision a new top-level Intranet site collection.

    After the new top-level Intranet site collection is provisioned, test navigating to the URL for this site collection from within the Remote Desktop session to the server.

  22. On the SharePoint 2013 Central Administration site, configure a Public URL alternate access mapping for accessing the new top-level Intranet site collection from the Internet.
    1. On the Central Administration site home page, click the Configure alternate access mappingslink.
    2. On the Alternate Access Mappings page, click the Edit Public URLs link.
    3. On the Edit Public Zone URLs page, select and specify the following values:- Alternate Access Mapping Collection: SharePoint – 80
       Internet: http://XXXlabapp01.cloudapp.net

      Click the Save button to complete the Alternate Access Mapping configuration.

  23. Close the Remote Desktop session to the server.
  24. Sign in at the Windows Azure Management Portal with the logon credentials used when you signed up for your Free Windows Azure Trial.
  25. Select Virtual Machines located on the side navigation panel on the Windows Azure Management Portal page.
  26. On the Virtual Machines page, click on the name of the SharePoint virtual machine – XXXlabapp01.
  27. On the XXXlabapp01 virtual machine details page, click on Endpoints in the top navigation area of the page.
  28. Click the +Add Endpoint button in the bottom navigation bar of the page to define a new virtual machine endpoint that will permit HTTP web traffic inbound to the SharePoint virtual machine.
  29. On the Add an endpoint to a virtual machine form, select the Add Endpoint option and click the Nextbutton to continue.
  30. On the Specify the details of the endpoint form, specify the following field values:- Name: WebHTTP
    – Protocol: TCP
    – Public Port: 80
    – Private Port: 80

    Click the Checkmark button to create a new endpoint definition that will permit inbound web traffic to the SharePoint virtual machine.

  31. After the endpoint configuration has been successfully applied, test browsing to the following public URL to confirm that you are able to access the Intranet site collection that is configured on SharePoint:- URL: http://XXXlabapp01.cloudapp.net

The configuration for this virtual machine is now complete, and you may continue with the next exercise in this step-by-step guide. Be sure to shutdown your lab VMs from the Windows Azure Management Portal when not in use to save on compute charges.

Original post at http://blogs.technet.com/b/keithmayer/archive/2013/07/15/step-by-step-build-a-free-sharepoint-2013-lab-in-the-cloud-with-windows-azure-31-days-of-servers-in-the-cloud-part-7-of-31.aspx#.Ukgoo4afjSw.

There are essentially to ways to host WordPress in to Windows Azure, the first is using the Windows Azure Websites feature (http://www.windowsazure.com/en-us/services/web-sites/), this is a good approach when you have simple solutions of wordpress that use plugin’s that runs equal in Windows SO as in Linux SO. The other way is mounting a server on the cloud, in some cases this can be the best option, if you want to create a dedicated server to host a few sites or if you have the need to share some content between different WordPress WebApps.

logho


In this post we will take a look in how to create the needed infrastructure to have a secure and optimized dedicated server for WordPress in the cloud. Let’s begin.

After accessing the portal create a new virtual machine

6

Select the type of virtual machine you wish from the gallery of pre-built templates that azure offers, this will help you have your job done quickly.

5

Once in the Virtual Machine pre-build templates choose to use one of the distributions of linux. I prefer Suse Enterprise Server because for me is one of the most secure and configurable distributions of linux, and when you want to expose a server on the web this can make the difference. His configuration is a little more difficult than Ubuntu distributions but what you win with this choice worth’s the work.


4

Provide the Machine name, administrator and password or certification chain

3

After that choose the World datacenter zone where you wish your machine will live and a storage account for your hard drive, I prefer to have a storage for each VM i create. Define also a availability set for your vm if you don’t have already one in your Infrastructure, this is particularly important to grant the high availability of your Machine.

After the machine as been created you should enable the remote desktop. To do that you have to connect yourself to the remote machine using a SSH client, since this is the only endpoint opened in your recently created machine, in our case I will use putty client  (http://www.chiark.greenend.org.uk/~sgtatham/putty/download.html). After running the *.exe file you should look in your Windows Azure Dashboard for the SSH details, copy that address:port and paste it on the putty console (on the Host Name field), and click open.

2

When you click open if the connection is succeeded your operating system will ask if you trust the server footprint, validate that footprint in to the dashboard. After this a black console will open for you to login in the server.

1

Now is time to enable VNC to allow you can use windows to access the Guid of your Linux server, for less practices Linux user’s this can be essential.

After that we will configure our FTP and Apache server Feature, in the next part of this post we will guide you in a step by step process to end our goal, for the most experience Linux administrators you can start at this point with the configuration of your server.

If you are looking for a good article about Windows Azure service bus i recommend you to take a look at this article:

http://msdn.microsoft.com/en-us/magazine/dd569756.aspx

If you need a indeep knowldge about queues in service bus i would recommend you the following links

http://geekswithblogs.net/EltonStoneman/archive/2012/09/19/integration-patterns-with-azure-service-bus-relay-part-1-exposing.aspx

http://www.windowsazure.com/en-us/develop/net/how-to-guides/service-bus-queues/

http://blogs.msdn.com/b/appfabric/archive/2011/05/17/an-introduction-to-service-bus-queues.aspx

How to build Service bus Clients

http://msdn.microsoft.com/en-us/library/windowsazure/ee173543.aspx

How to consume Service Bus from other frameworks

http://rickgaribay.net/archive/2012/01/19/common-service-bus-queue-operations-with-the-rest-api.aspx

Today i was helping a MSP with some of his ASP.NET project problems. One off the bigger problems he had was how to quickly bring some kind of authentication/ authorization to his WebApp.

So i had spend some time explaining and showing how to use this fantastic ASP.NET feature. After a while i receive a new call from my friend asking why he couldn’t do what he had seen with me.

I ask him what’s the problem he are running in to? If it was something with the creation of user’s or the membership  part of the solution?

He had answer that the problem was on the database creation part,

And he had email me the screen shoot of the problem

errorAfter some time trying to understand what was the problem that takes the sql form register fail ( you can run the wizard of creation the authentication database by using the command C:\Windows\Microsoft.NET\Framework64\v4.0.30319\aspnet_regsql.exe ), i’ discover that was a difference between what my friend was doing and what we had done together.

The difference was that José was using SQL Azure as the database backend. When using SQL AZURE as the database of ASP.NET forms authentication the way we prepare the database is different. When preparing the database in a on premises situation you use the following command

aspnet_regsql -S [your server name].database.windows.net -d [your database name] -U [your user name]@[your server name] -P [your password] -A mr

This make a call to the visual studio creation wizard, that is not prepared for the azure databases, so in cases where you have SQL Azure as the Database Engine of your forms authentication database you should download a special tool to your intent, this tool can be found at , http://archive.msdn.microsoft.com/KB2006191/Release/ProjectReleases.aspx?ReleaseId=3539 after unziping the tool you run the command:

aspnet_regsqlazure -s [your server name].database.windows.net -d [your database name] -u [your user name]@[your server name] -p [your password] -a mr

And you are ready to develop your asp.net forms authentication solution using azure as the database engine.

ps:

If you need to know more about forms authentication in asp.net go to:

http://www.asp.net/web-forms/videos/authentication/using-basic-forms-authentication-in-aspnet

http://msdn.microsoft.com/en-us/library/ff649314.aspx

SQL server DataSync is one of the most important features when we have the need to sync our on premise data with Azure SQL  Services  and vice verse  In this post we will define a step by step  method to accomplish the task of sync the Azure SQL services with the one onPremise SQL Server.

datasync scheme

To start we will consider that you already have a Database running on the Azure SQL Services and a configured SQL database server.  Already having a database on Azure and a pre-configurated SQL server Machine, we start by creating a  Azure Sync Group. We can define a Azure Sync Group “as a collection of SQL Database instances, and SQL Server databases that are configured for mutual synchronization by the SQL Data Sync service. A Sync Group is comprised of a “hub” database and one or more “member” databases”. Be careful to create your SQL Data Sync server in an appropriate region.

Data Sync is one of that features that is not yet avaable in the new portal of windows azure so the first step is to revert to the old management portal of Windows Azure, you can anchieve that by clicking on your name at the right top of the screen and select to go to the old portal.

oldportal

Once in the old portal you should select Data Sync Option, and after that on the main pane select Provision Data Sync preview Server

datasyncoption

After that it will be asked to choose a subscription and a location.

selectregion

After the provision of our sync server we will create our Syncronization Group

syncdatabasegroup

After that we choose a name to our Sync group and select the Azure Database we intend to be the Data Hub

synchub def

After configure the source Azure Database, let’s choose or on premise server

synchub def2

WE select the option to have a new sql database since we consider that we have not yet a Sync Agent installed int the on-premised SQL server, we can choose also the direction of the sync in this case we had selected to have the sql azure as the source of the Synchronization.

synchub def3installagent

After clicking next you will download the agent, after that install the agent on you on-premise server. After installing the agent launch the Microsoft SQL Data Sync Agent, in the management console of the agent we should insert the key that we had receive previously.

clip_image022[4]


After defining the agent key we should register the appropriate database on the server.


conf agent


After register the on-premise database be acrefull to validate the satet of the database ( it should appear in the reachable state).

confdb 2


Now that we already had install and configure the Sync Agent on our SQL Server let’s go back to the portal and follow the rest of the steps

download the agent


After the last step the on-premise database will be connected to Windows Azure, it’s now tim to configure the schedule (since this is a lab and we need quick results let’s use a sync interval of 5 minutes). pay attention to the conflict resolution combo and select the must interesting option for your case.

clip_image030[4]

Next we define what  data will be sync. After all this configuration is time to deploy the Sync Group, by clicking in deploy.

deploysync The Sync Group will be provisioned and the first data synchronization will run. After a few seconds the status of the two databases should transition to good. And now you had ended your synchronization configuration. Hope this post had help you to a better understanding of the needed configuration needed to sync your Windows azure services with on-premises SQL server.  No it’s time for you to explore more this powerful mechanism, if you have questions feel free to ask.